For years I’ve wanted to have more than one Christmas tree. And for years I wanted a flocked Christmas tree. This year I got to check that dream off the list and I got a flocked Christmas tree for our dining room. I’m still putting the finishing touches on the rest of my dining room, but I can show you how I decorated our flocked Christmas tree!
Although I always knew that a beautiful flocked tree would look perfect in a formal dining room, I didn’t let that stop me from having one in our informal dining room. I shared a small preview of this pretty flocked tree, but now I want to show how it looks all complete!
*this post includes affiliate links for your shopping convenience, you can read more about affiliate links by reading my Disclosure*

Because our living room and dining room are open to each other, I knew that I wanted this Christmas tree to compliment my main tree. Yet I didn’t want it to compete with it. I like to think of them as sisters, but not twins.
My holiday decor style is pretty traditional with lots of reds and greens. For this tree I knew that I wanted to focus on those colors but with an emphasis on green ornaments. Finding the perfect green ornaments was no small feat. I wanted larger ornaments, preferably in a dark matte green.
One of the issues I ran into was how hard it was to find what I wanted in stores. I was decorating early and yet really struggled to find what I was looking for. After spending more money than I wanted to, I think I’ve been able to strike a nice balance with what I have.
My ornaments are from Hobby Lobby, Target and the At Home store.

I also wanted to use white tartan plaid ribbon to tie in with the rest of my Christmas decor. The beautiful plaid ribbon I used I found at Walmart in store. Although I prefer my wire ribbon to be super stiff, this was surprisingly nice to work with at under $5 a roll.

After the ribbon and the ornaments, I wanted to use picks to fill out the tree. There are a variety of picks I used, but I started with these snowcapped pinecones. I knew they would be perfect on a flocked tree!

Next I added a few flocked stem picks. You can also mix and match greenery and add flocked picks to a green tree or green picks to a flocked tree. I didn’t go that route because I wanted to fully experience having a flocked tree. Maybe next year I will experiment a bit more.

After adding a few flocked stem elements, I knew that I wanted to add red berry picks. And I definitely added a variety of them! My favorite are the snow capped berry picks from Hobby Lobby. They’re nice and full and add a lot of personality to my tree.
There’s also some darker berry picks that I got from both Hobby Lobby and Walmart.

Lastly I added some poinsettia picks that I used last year. I feel like they add the finishing touch to complete the tree. Honestly the tree itself I felt was of a decent fullness. I probably could have made sure I touched each and every branch when fluffing. But let’s face it, I got lazy.

Well, almost complete the tree…
Starting at the bottom of the tree. I think there needs to be something at the foot of the tree. Whether that’s a tree skirt or a tree collar. I knew that because it’s located in the corner, a tree skirt wouldn’t work. Originally I thought about using my red cable knit tree skirt from last year, but didn’t want to take my chances with the flocking getting all over it.
So I thought a tree collar was the way to go. The problem is…tree collars can get pretty pricey! I was looking for a basket weave style but just like I had a hard time finding ornaments, such was the case with a tree collar.


After searching store after store, I lucked up with this red tree collar from Michael’s. It was on sale for under $25 and will be perfect for this tree or any other smaller width tree year after year.
Here’s a quick tip: a tree skirt is usually added last, but a tree collar needs to be added first. Trust me on this! My collar isn’t fully attached in the back, but if I didn’t tell you, you wouldn’t know 🙂

Now for the final finishing touch…the tree topper. I tried so many options from bows, to using berry stems to create a topper, to a Santa hat. I had tried the Santa tree topper that was on my tree last year early on. And I didn’t like it.
I was prepared to just have the tree without a topper, and I was fine with it. But I decided to try the Santa hat topper again. This time I liked it. Now, my flocked tree is complete! And I love it!

It wasn’t easy to get pictures of just the tree without a lot of the rest of the dining room space as well. Not to mention that some of these pictures I had to take during prime daylight hours, which mean it’s during my workday. I work right next to the tree, so I was also trying not to get all of my work stuff in the shots too.
Also trying to get the right lighting while the tree is lit is proving a bit difficult for my novice photography skills. Hopefully you can still see the beauty that I was trying to capture.


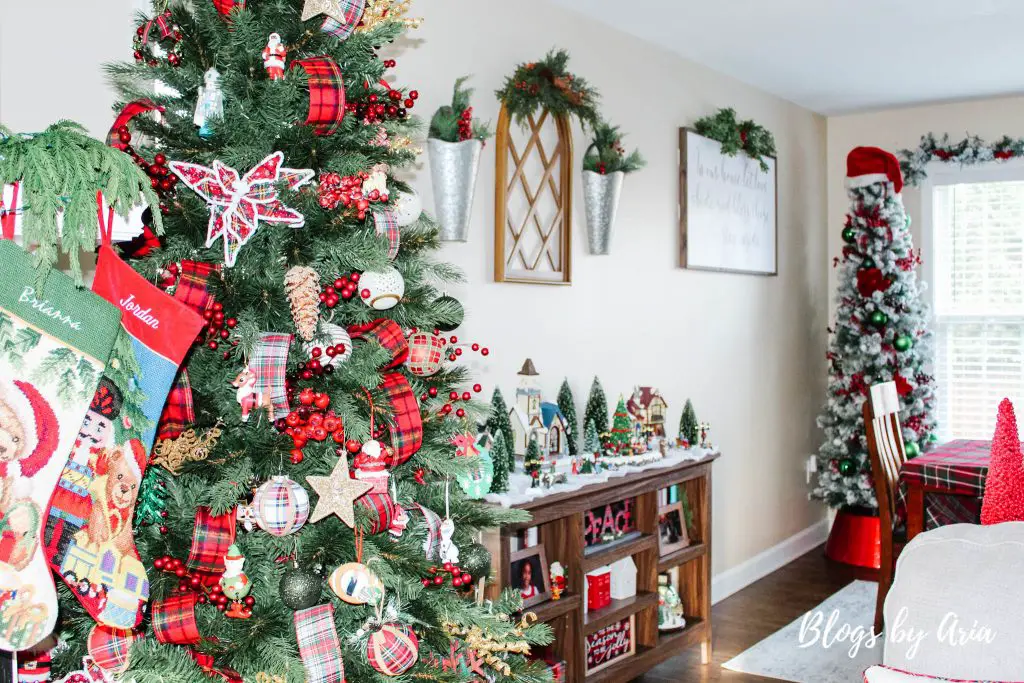
Last but not least, here’s a sneak peek at both of my trees in action ♥ The most wonderful time of the year indeed. And how is it already December?!? It’s my sincere hope that I am able to inspire you when I share my decorations. Also it’s my sincere goal to get all of my Christmas decor related posts up before mid-month!! Until next time my friend 🙂


[…] no time at all to pull together. I got the tartan plaid table runner last year. I shared my flocked dining room tree recently if you want to see more details about […]