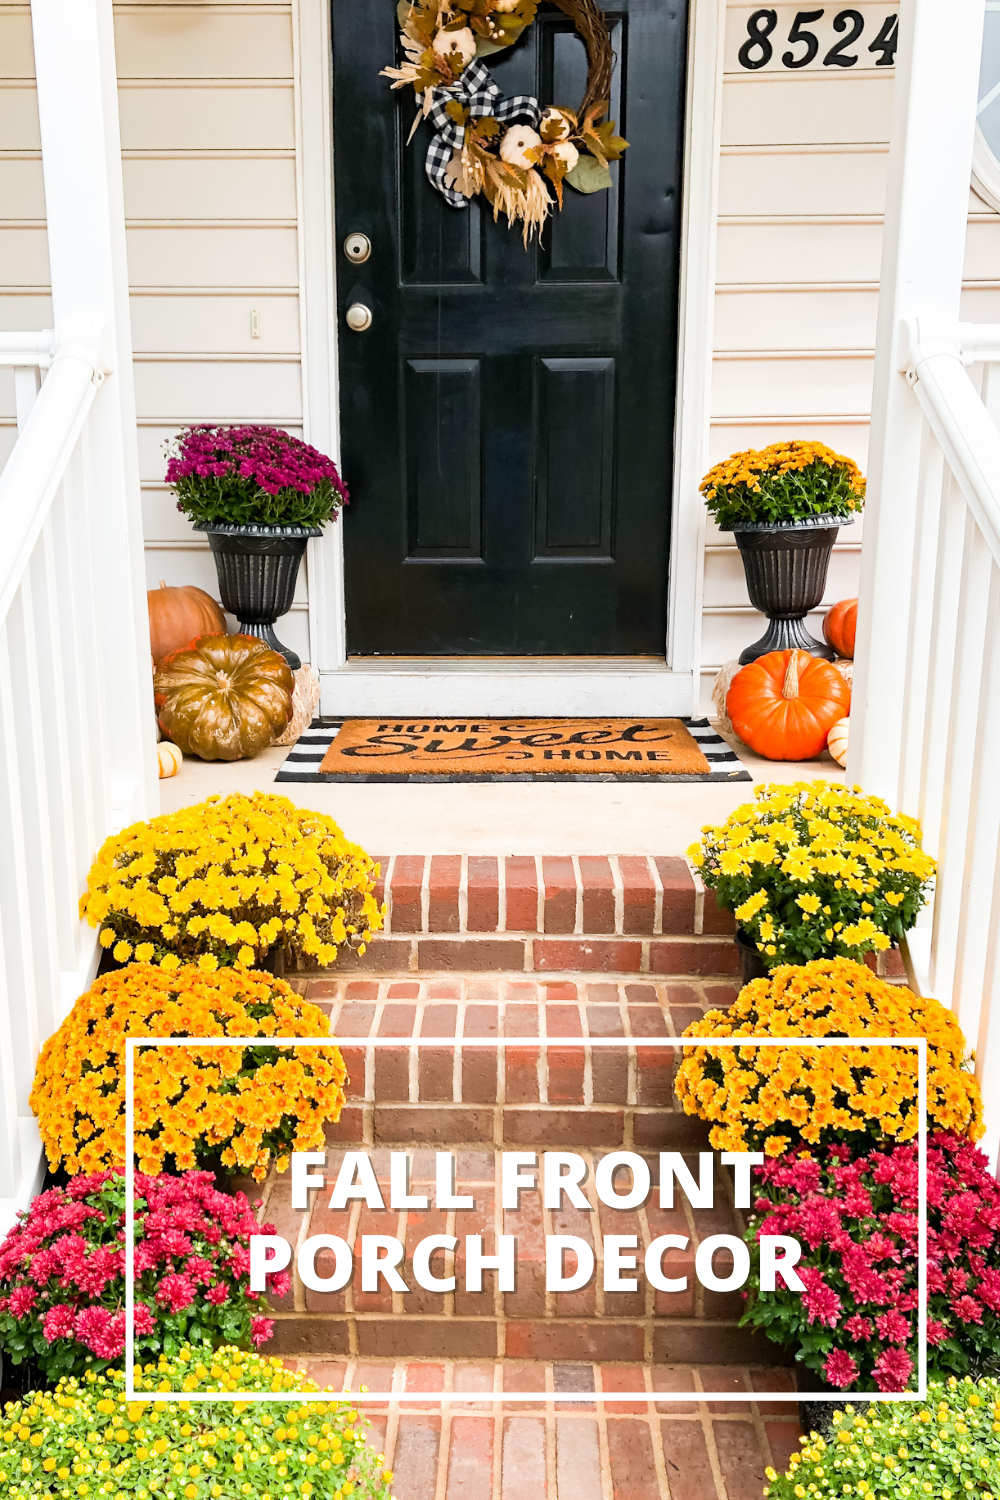
For the last few weeks I’ve wanted to share my fall front porch but I was waiting for my mums to bloom. Now that they have I’m excited to show you how I’ve decorated my front porch for fall. This is my first time being able to decorate our porch for the season, so I was very excited to give it a shot!
*this post includes affiliate links for your shopping convenience, you can read more about affiliate links by reading my Disclosure*
Because this was my first time decorating a fall front porch, I was chomping at the bit to get started! The first item I purchased for our front porch, I got super early. When I shared my fall decor haul I showed you my wreath I got from Kirkland’s.
It kind of lead the way for the direction I was trying to go with my color scheme. Let’s discuss…

Originally because the wreath is neutral, I wanted to stick with neutral mums of white and yellow. So I started with white and yellow mums. Some of them made it, and some of them didn’t.
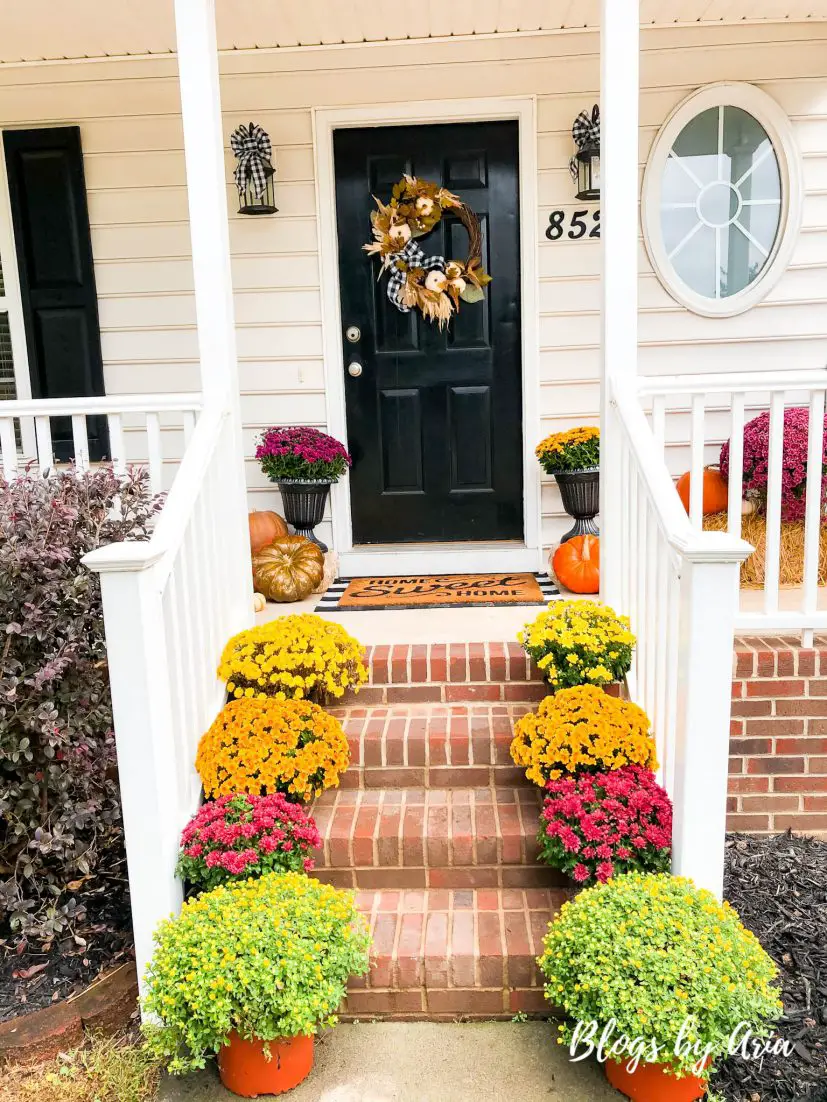
I decided to pull from the buffalo check bow from the wreath and added a buffalo check mat for under my doormat. And I also added a buffalo check bow to each of the sconces. I kept my original doormat instead of switching it for a fall related one. At this point, I really only change my doormat for the holidays.
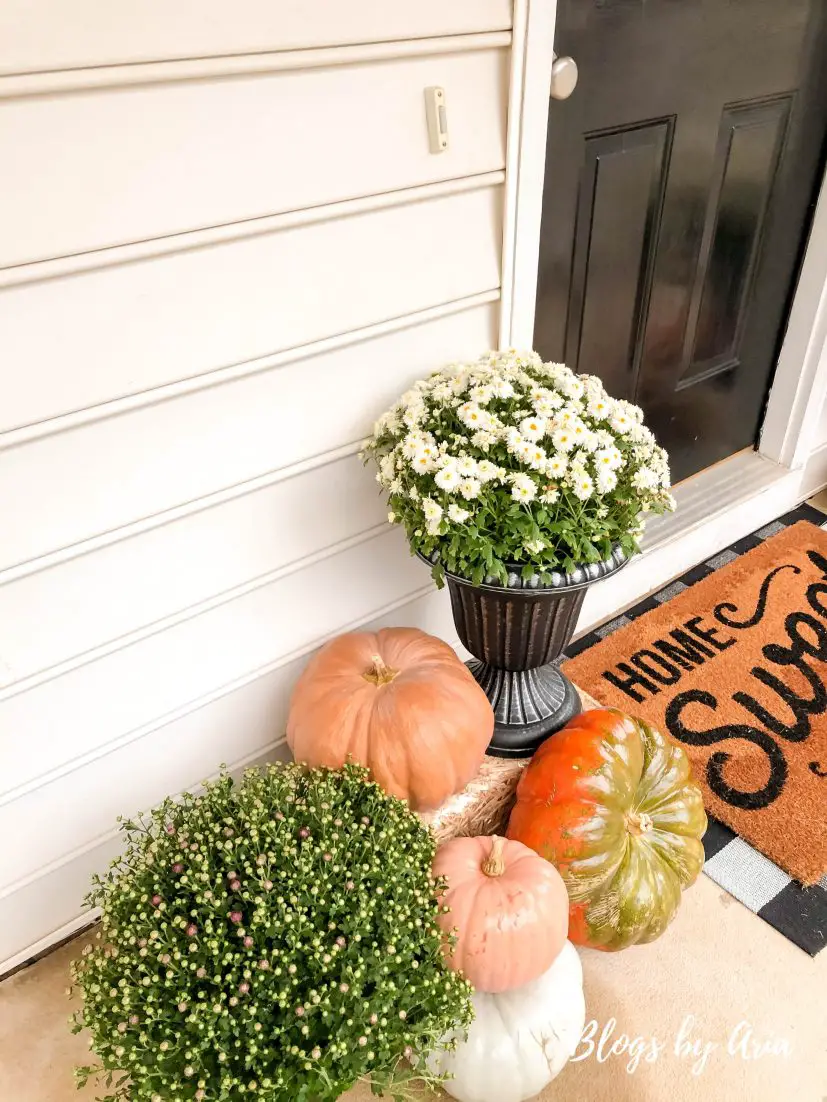

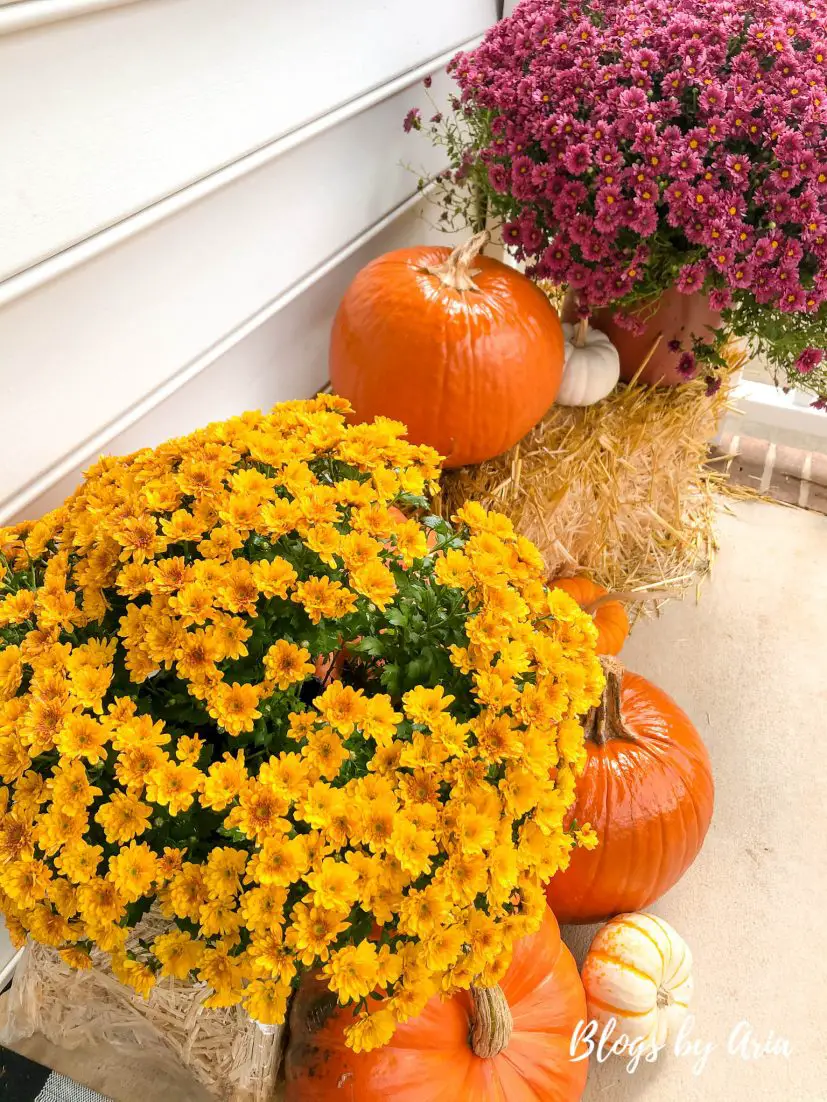
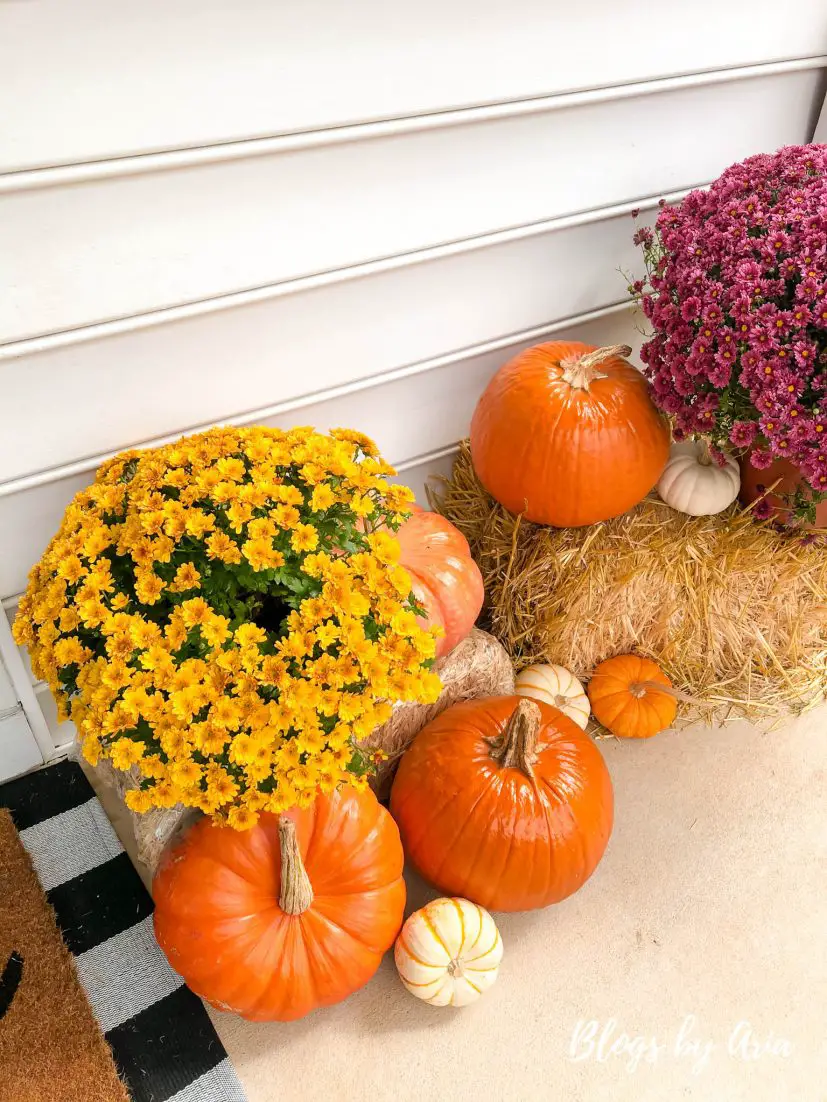
In my mind I wanted large urns for my mums to sit in. But large urns are pretty expensive. So I purchased some inexpensive urns from Home Depot. I figured I could put them on top of the hay bales to give them extra height.
Over the past few weeks I’ve learned a few things about mums, pumpkins and hay bales. For one, the urns don’t quite work well if they don’t have holes in them. Every time I watered my mums the water wasn’t draining.
You can see in the pictures above the white mums were originally in the urns. They didn’t survive unfortunately.
Last week I noticed that a lot of the mums on my porch weren’t thriving (some were downright dying). So when I was watering them at the beginning of the week I decided to move them down to the grass to give them a chance to get more sun.
I also purchased bloom booster to see if that made a difference. Within a couple of days I was seeing a remarkable change in many of my mums.
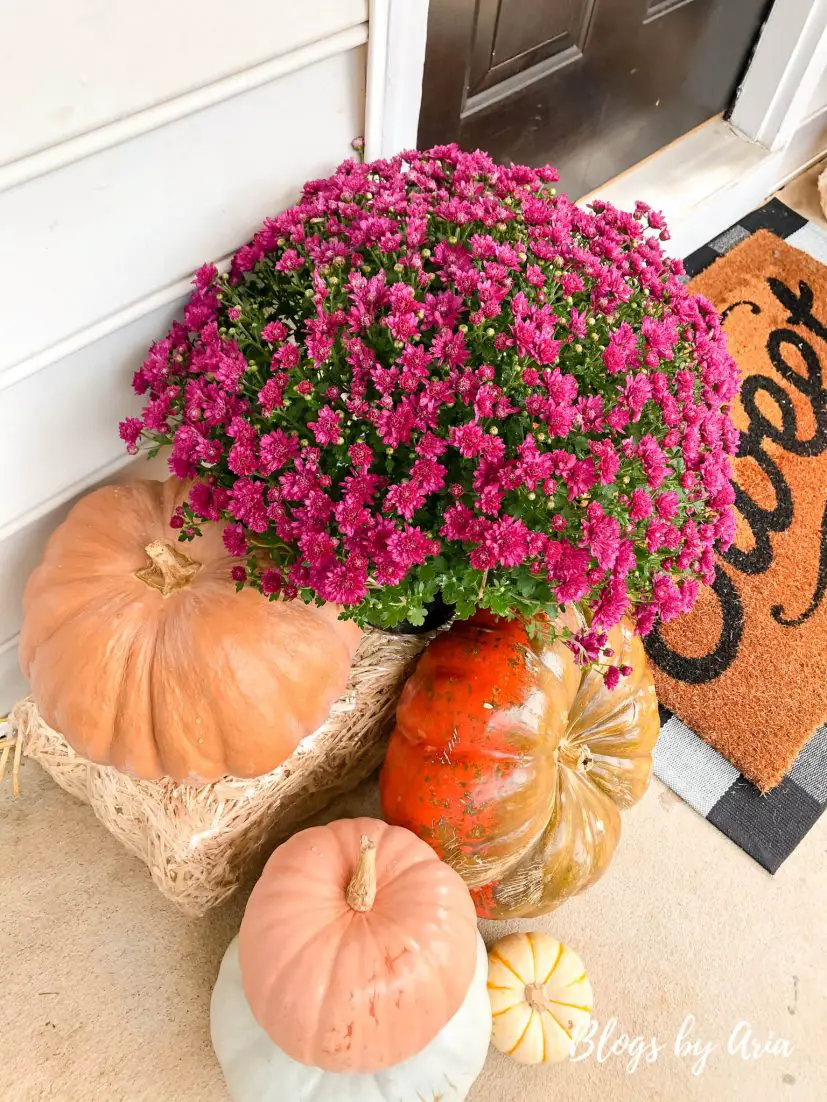
We started out with just a few mums. Two white and two yellow. Then one morning I was doing my grocery shopping at Harris Teeter, and they had these gorgeous huge mums. So I grabbed one. It was purple. Totally against my color scheme. It’s the mum on the far right hand side.
I went back to find another large mum and they didn’t have anymore. But they did have the two larger ones that you see at the bottom of the porch stairs. The rest of the mums came from both Walmart and Home Depot. I was trying to get enough to make it even and to account for the ones that I felt wouldn’t survive.
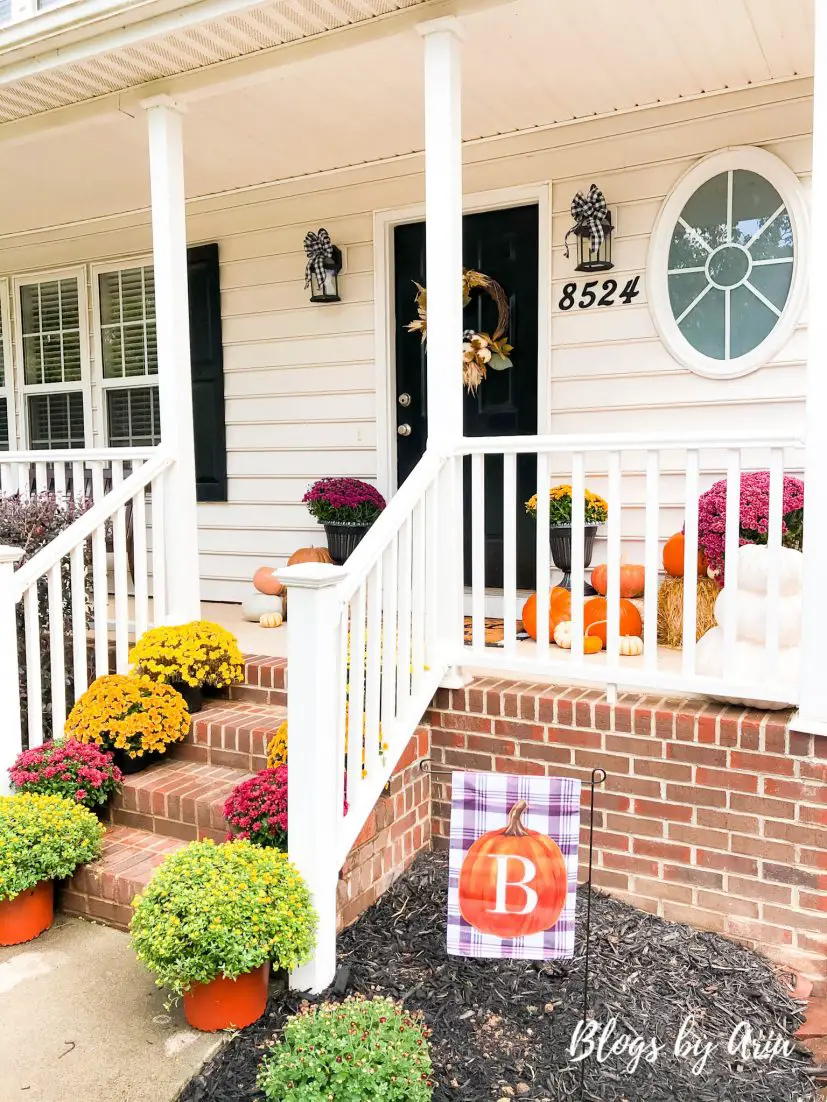
The yard flag is from Kirkland’s. I’m looking forward to switching it out seasonally. My husband planted a couple of mums in this space and he tried to bring one of the dying ones back to life but so far it hasn’t started to turn around.
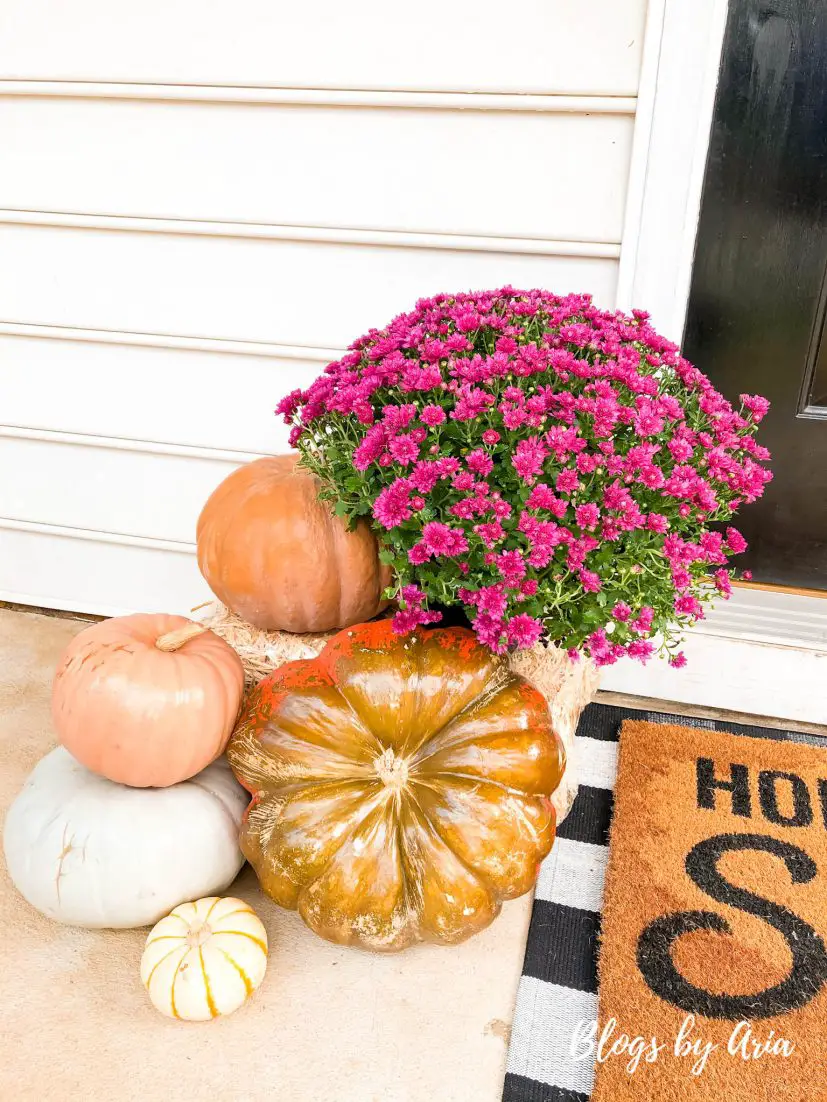
The majority of the pumpkins I got came from Trader Joes. I really didn’t want your standard everyday pumpkin. Trader Joes has such a beautiful selection of fantasy pumpkins that are lots of pretty shapes and colors.
If you have a small front porch, this is a great example of how you can decorate a small front porch area for fall.
Yes, these hay bales I kept in plastic. I knew they would be messy but I had no idea they would be as messy as they are. So after I learned that lesson with my first hay bale on the right side of the door, I decided to just leave them in their wrap…and to never purchase hay bales again.
Maybe in the future I will use wooden boxes or containers to create height instead of the hay bales.
You can see I did get two regular pumpkins. They were on a great deal at Harris Teeter. Have you any idea how much pumpkins can cost? I stopped at a pumpkin stand a couple of weeks ago and was looking for white pumpkins. Some of them were over $20 each!! Needless to say I left that pumpkin stand. I want to support small but I can’t pay two or three times what I would spend at a grocery store.
The smaller pumpkins are the same ones I used on my mantel when I showed you my fall home tour. When I took them down to put up my halloween mantel decor, I knew I could use them on my porch.


I took these pictures the moment it stopped raining! I’m happy with how my fall front porch decor has turned out and I’m done moving things around. My goal is that my pumpkins and mums survive at least through Halloween. If they last through Thanksgiving that would be even better.
Now that I’ve learned a little something about my lack of green thumb and pumpkins I must say that my porch decor plans may change in future years. Buying large faux pumpkins is pretty expensive. But they’re less hassle than real pumpkins. Did you know you’re supposed to soak/wash pumpkins in order to prevent mold? That wasn’t fun.
You may notice that my pumpkins look pretty shiny. In my research on keeping my pumpkins preserved I saw that some suggest after soaking them that you spray paint them with a clear paint. I couldn’t find a matte finish so I just used a glossy finish.
I’ve also learned, at least so far, the best mums that I have are ones that I got on my second and third run. So that means I should wait until mid-September to get my mums. Maybe even waiting until October would be a better option.
Not pictured is a bench we have on our front porch. I know a lot of people like to decorate their seating area as well but, because our porch isn’t symmetrical I didn’t feel the need to.
All in all, I’m pretty pleased with how my fall front porch has turned out. And I’m glad that I ended up getting lots of colorful options because they are so beautiful.


[…] learned after decorating my front porch for Fall that under the porch doesn’t get the best direct sunlight. That’s another reason I didn’t […]